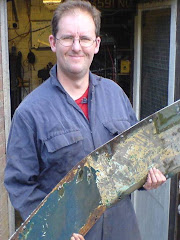
 The welding inside the channel, providing fillet reinforcement to the ropey front, had been completed and the right hand panel completed, so the channel was ready for its interior surface with its captive nuts. - You will recall that the originals had been rusted to buggery. The circular holes will accommodate the captive nuts.
 I had made this dash-panel up in two parts, welded together in the middle. You can see from the shadow that it is bowed (like a kid's drawing of a bird in the distance); and it is made of two subtle arcs. I drilled the fixing holes by using the original panels as patterns; same for the vertical slots, which had to be chain drilled and chiseled out.
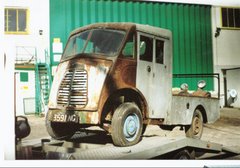
The steel came from the roof of a 1958 Ford Popular, incidentally, which was suitable because it is good, solid 18 gauge stuff, which was coated in thick rust-proofing etc. It needed a fair amount of preparation to get it down to a weldable, workable surface. I have used a lot of this reclaimed steel for patching...and it feels rather special it coming from a car of the same era.

Then I bolted the panels (the Right one can be saved; the left will be a pattern for a replacement) to the dash-panel using specially purchased 6mm button domed hex bolts, which are tightened with an Allen key.
 Above you can see the dash panel before I welded the nuts "captive". Captive nuts (which will be inaccessible inside the solid channel) mean that it will be possible to bolt-on and unbolt panels from inside the cab (without holding the nut).
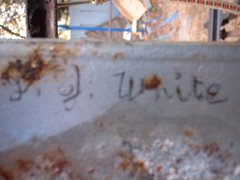
Incidentally, the painted labels date from when I was dismantling the van. I also photographed, bagged-up and labelled smaller bits. Photo reference is essential for putting stuff back together again a year or more after dismantling!
 Above, the panels were then bolted to runners on the cab (separate from the workpiece, so as to ensure correct alignment) and the top edge was cramped to the channel and tack welded, care being taken to tack the dash-panel, but not the cab panels, which were then removed.
 This is what we call pigeon-shit! It is weld done in blobs (after having tacked it every inch or so - kind of dot to dot welding), rather than one steady, professional stream. Not pretty, but once cleaned up it does the job.
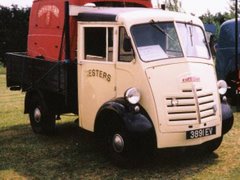
 And here you can see the panels bolted to the cab for the first time - without the assistance of cramps.
Next I think I shall tackle the POR-15 treatment, especially the radiusing of paste along the front of the windscreen surround.
I also need to go to a steel stockholder and get some steel to make up a new left hand cab panel - as the Ford Popular stuff is all used up! Incidentally, if you want to know what happened to the rest of the Ford, have a look.


No comments:
Post a Comment